
About six months ago, in one of our articles titled how to convert install.ESD file to install.WIM, we talked about converting ESD (Electronic Software Download) file to WIM file with the help of a third-party tool called WinReducer WIM Converter. The tool lets you convert files between ESD and WIM with ease.
After going through our how to convert install.esd file to WIM guide, many users asked us to publish a guide to convert ESD file to ISO but the lack of an easy-to-use and straight-forward software forced us to wait for the release of an easy-to-use software for the job.
The good news is that the popular NTLite software, the free tool which lets you tweak and customize Windows installation, now lets you convert ESD files to ISO. In addition to converting ESD files to ISO format, it also lets you convert ESD files to WIM and vice versa. I
Because only Windows 8 and Windows 10 support installing from ESD files, NTLite displays ESD conversion option only when you load an edition of Windows 8, Windows 8.1, or Windows 10, meaning this option will not appear when you load an edition of Windows 7.
Because only Windows 8 and Windows 10 support installing from ESD files, NTLite displays ESD conversion option only when you load an edition of Windows 8, Windows 8.1, or Windows 10, meaning this option will not appear when you load an edition of Windows 7.
Note that NTLite doesn’t support encrypted ESD files. Because of this, if the downloaded ESD file is encrypted, please go through the steps in our Method 2 to decrypt the ESD file before converting the same to ISO.
Convert Install.ESD to ISO using NTLite
Method 1 of 2
In order to convert ESD image to ISO, please complete the following instructions.
Step 1: The first step is to download and install NTLite on your PC. As you likely know, NTLite is available in both free and paid versions. If you can’t afford the paid version, go ahead and download the free version as it supports converting ESD image files.
Installing NTLite is a straight-forward job and should not take more than a minute. You can run NTLite on both x64 and x86 versions of Windows 7, Windows 8, Windows 8.1, and Windows 10.
Installing NTLite is a straight-forward job and should not take more than a minute. You can run NTLite on both x64 and x86 versions of Windows 7, Windows 8, Windows 8.1, and Windows 10.
Step 2: It’s time to unpack your Windows 8 or Windows 10 ISO image to a folder. You can use file archiving utilities such as WinRAR, 7-Zip (free) or WinZip if you are on Windows 7 as it doesn’t include native support for ISO image files. After installing one of these file archiving utilities, you just need to right-click on the ISO file and then select appropriate options to extract the contents of the ISO file.
Both Windows 8 and Windows 10 support mounting ISO image files out of the box and you can copy the contents of ISO file without the help of third-party utilities.
Both Windows 8 and Windows 10 support mounting ISO image files out of the box and you can copy the contents of ISO file without the help of third-party utilities.
In Windows 8 and Windows 10, right-click on the ISO file, click Mount option, and then copy all files from the newly mounted drive in This PC to a new folder.


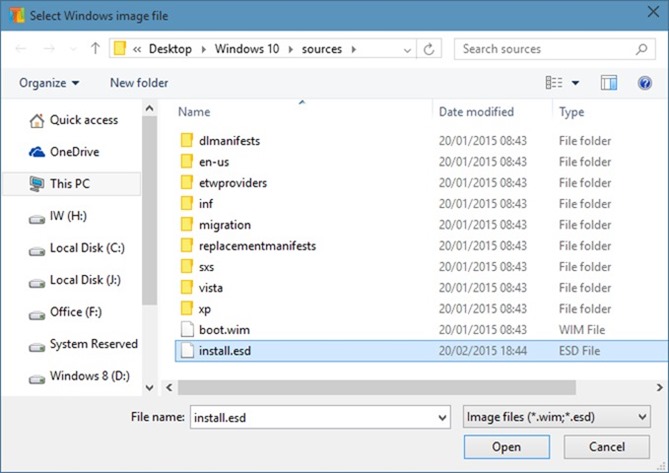
Step 3: Launch NTLite software. Click the small down arrow button below the Add button, click Image file (WIM, ESD) option, browse to the ESD file and then click Open button.
Step 4: Now, select the Windows version and edition (see picture) to activate Create ISO button. Note that if the Create ISO is greyed out and not allowing you to click, please click or select the Operating system (which appears under Image History).
NOTE: If the Create ISO button is greyed out even after selecting the version as shown in the below picture, it’s likely because the ESD file is encrypted. The current version of NTLite doesn’t support encrypted ESD file. Please refer to the Method 2 to decrypt the ESD file and create the ISO file if the Create ISO button is greyed out.

Step 5: Finally, click Create ISO button (see above picture), select a location to save your new ISO file, and then click Save button to begin the converting the ESD file to ISO.


The time required to convert the file mainly depends on your PC configuration and the size of the ESD file.
Once the ISO image is ready, you can either burn the ISO image to a DVD or create a bootable USB to install Windows from USB drive.
To convert files between ESD and WIM, please follow the above mentioned instructions. The only change is that, after browsing to the ESD file and selecting Windows version, you need to click the Convert button.
Convert encrypted Windows 10 ESD to ISO
Method 2 of 2
Go for this method if the ESD file is encrypted, as the above mentioned method doesn’t support encrypted ESD files. This method can be used to convert both encrypted and decrypted ESD files to ISO.
Step 1: The first step is to download ESD Decrypter tool from here. Extract the .7z file to a new folder to get a folder named DISM and a a file called Decrypt.cmd.
Step 2: Now, copy the ESD file to this new folder containing extracted files from the ESD Decrypter.

Step 3: Right-click on the Decrypt.cmd file and then click Run as administrator option to run the same with admin rights. Click Yes button when you see the User Account Control box.

Step 4: Finally, press 1 on you keyboard and then press Enter key to begin creating the ISO file. Note that read all options carefully as the options might change in future versions.

Your new ISO image file of Windows 10 should be ready in about 20 minutes and will vary on your system resources as well as selected Windows 10 ESD file size.
The new ISO file can be found under the same folder containing the extracted contents of the ESD Decrypter.
The new ISO file can be found under the same folder containing the extracted contents of the ESD Decrypter.
If there is a better tool or way to convert ESD file to ISO do let us in comments. Do let us know if you are experiencing any issues while converting your ESD file to ISO.
Thanks To Emma
This site have particular software articles which emits an impression of being a significant and significant for you individual, able software installation.This is the spot you can get helps for any software installation, usage and cracked.
ReplyDeleteultraiso-crack/
ntlite-crack
sony-vegas-pro-crack